Managing Liquidity
Creating a New Pool
To create a new pool, click "Create New Pool" in the "Pools" tab.

On the pool creation page, select the desired token pair. When selecting tokens, you can import those that are not listed. To do this, paste the token’s address into the search field.
Then specify the bin step and pool fee (LP fee). Detailed explanations of these concepts can be found in the "Concepts" section.
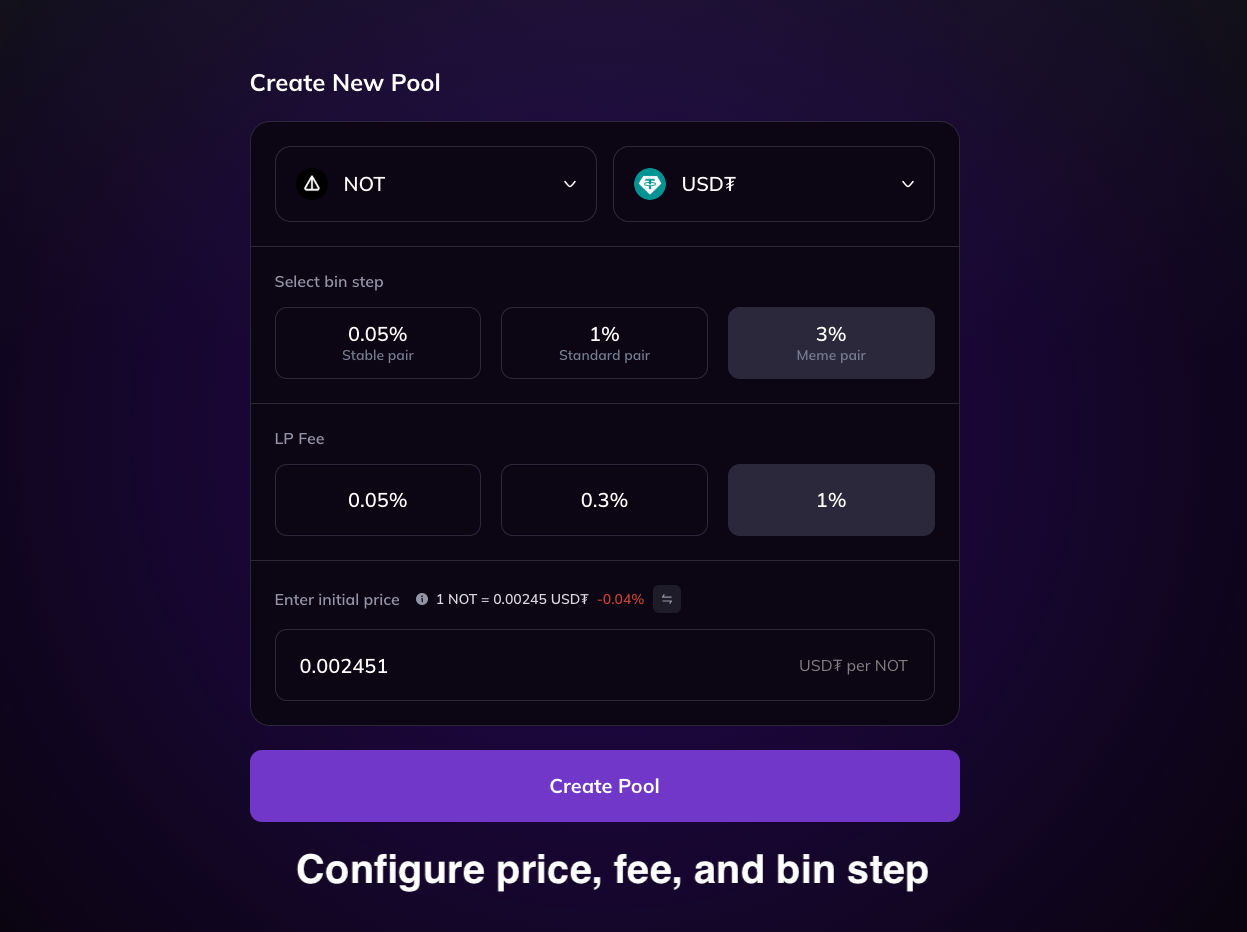
You also need to specify the initial trading price for the pool. For convenience, the real-time token price fetched from Dyor is displayed.
After filling in the fields, click "Create Pool". However, if a pool with the same parameters already exists, you will be redirected to the page for adding liquidity to the existing pool.
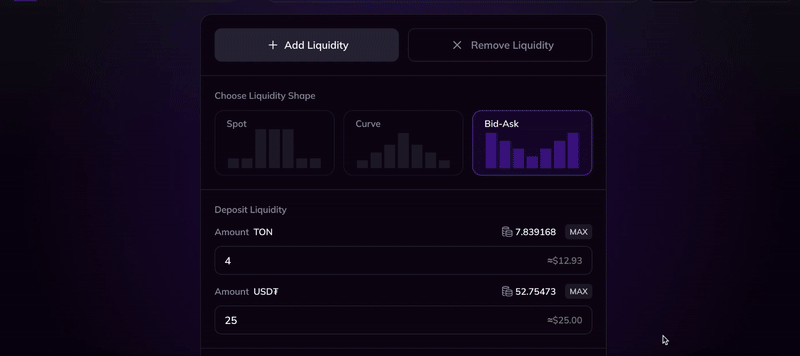
After clicking "Create Pool", you will be directed to the liquidity addition screen, as this is a required step. You can configure the liquidity shape; detailed information about liquidity shapes can be found in the "Concepts" section.
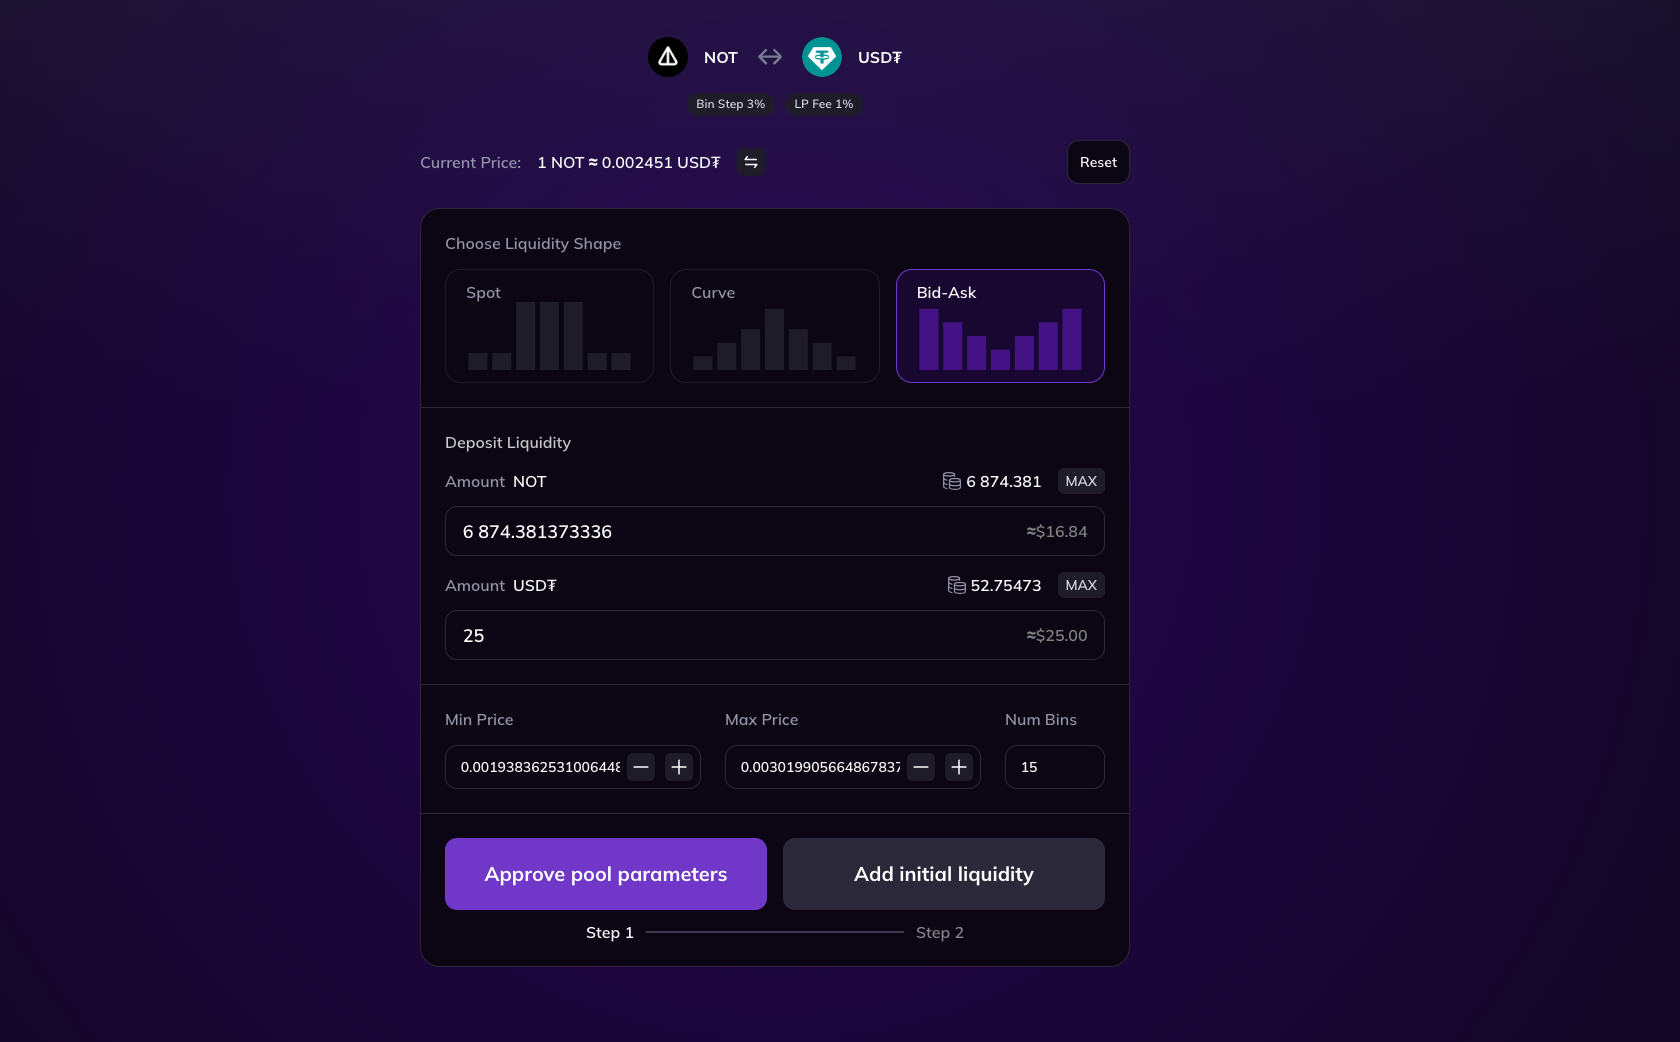
You also need to specify the amounts of tokens that will serve as the initial liquidity for the pool. The amounts can be entered freely, but both amounts must be greater than zero when creating the pool.
Finally, select the price range (or range of bins) in which the liquidity will be distributed. The bin with the active price specified on the previous screen must be included in this range. Keep in mind that the more bins selected, the higher the transaction cost and the more dispersed the liquidity will be. If only a single central bin is selected, the liquidity amounts must have a strict ratio, which is filled in automatically.
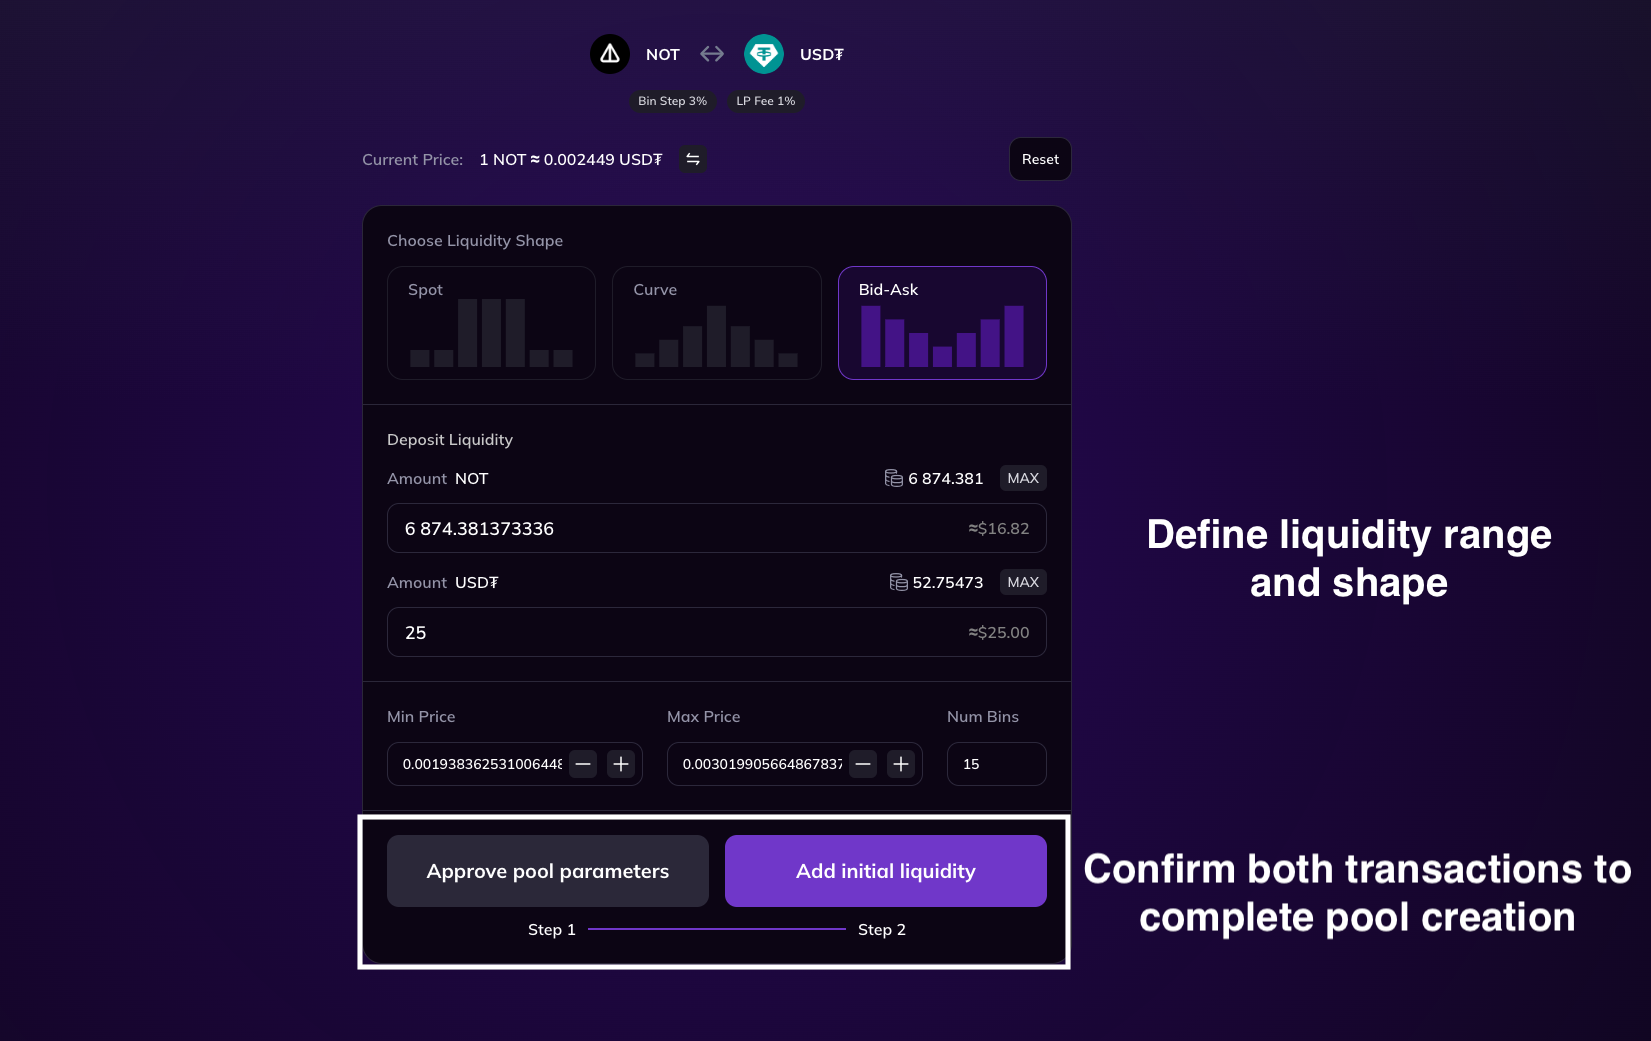
After filling in the fields, you will need to send two transactions, initiated sequentially by clicking the buttons in the interface. The first transaction is necessary to save the pool parameters, and the second performs the actual addition of liquidity. Consequently, the pool is fully created only after both transactions are successful.
After a short time, the newly created pool will appear in the list of pools, and the added liquidity will be visible in the pool's details.
Exploring Pool Information
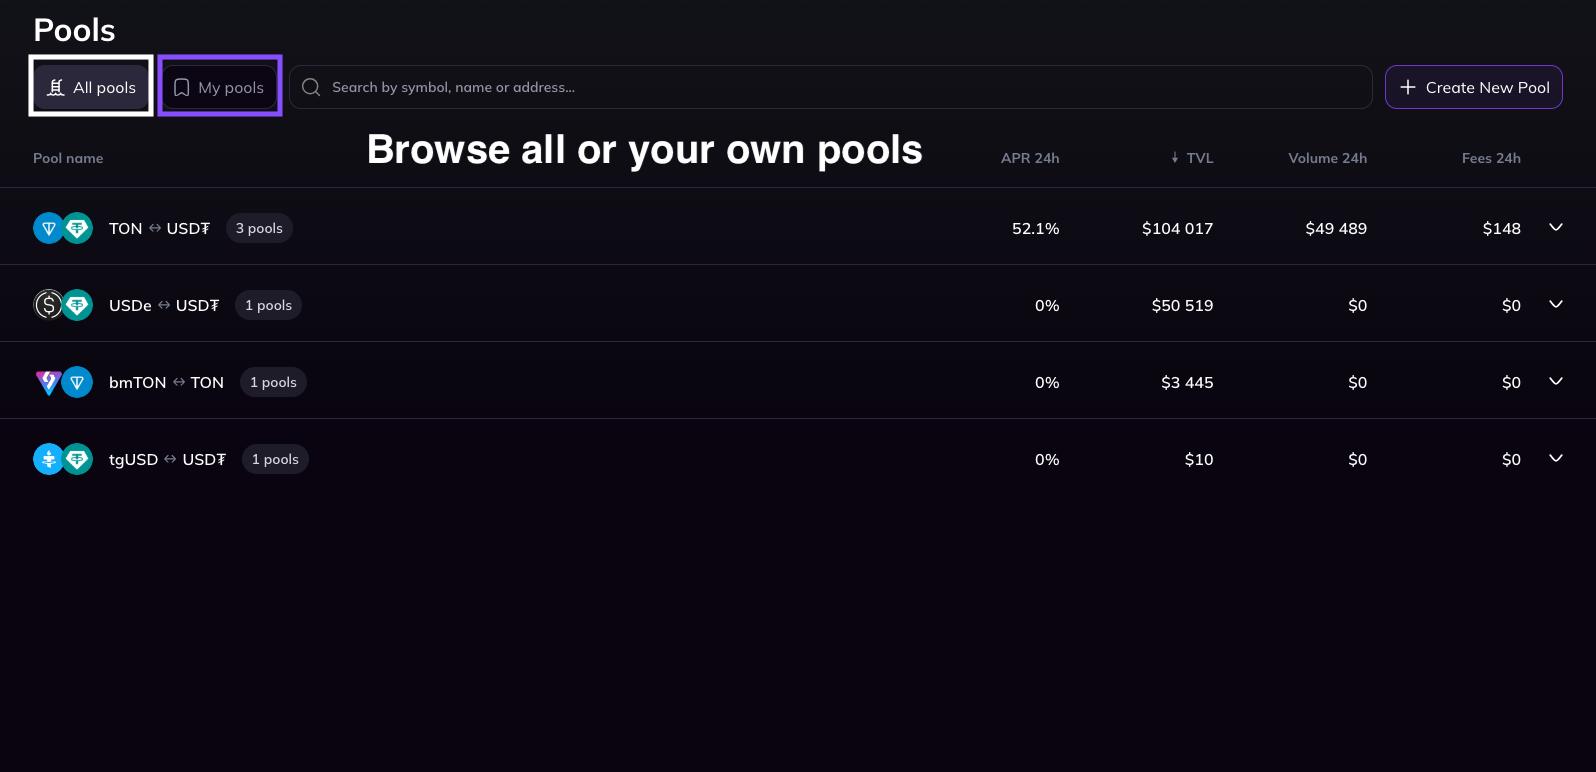
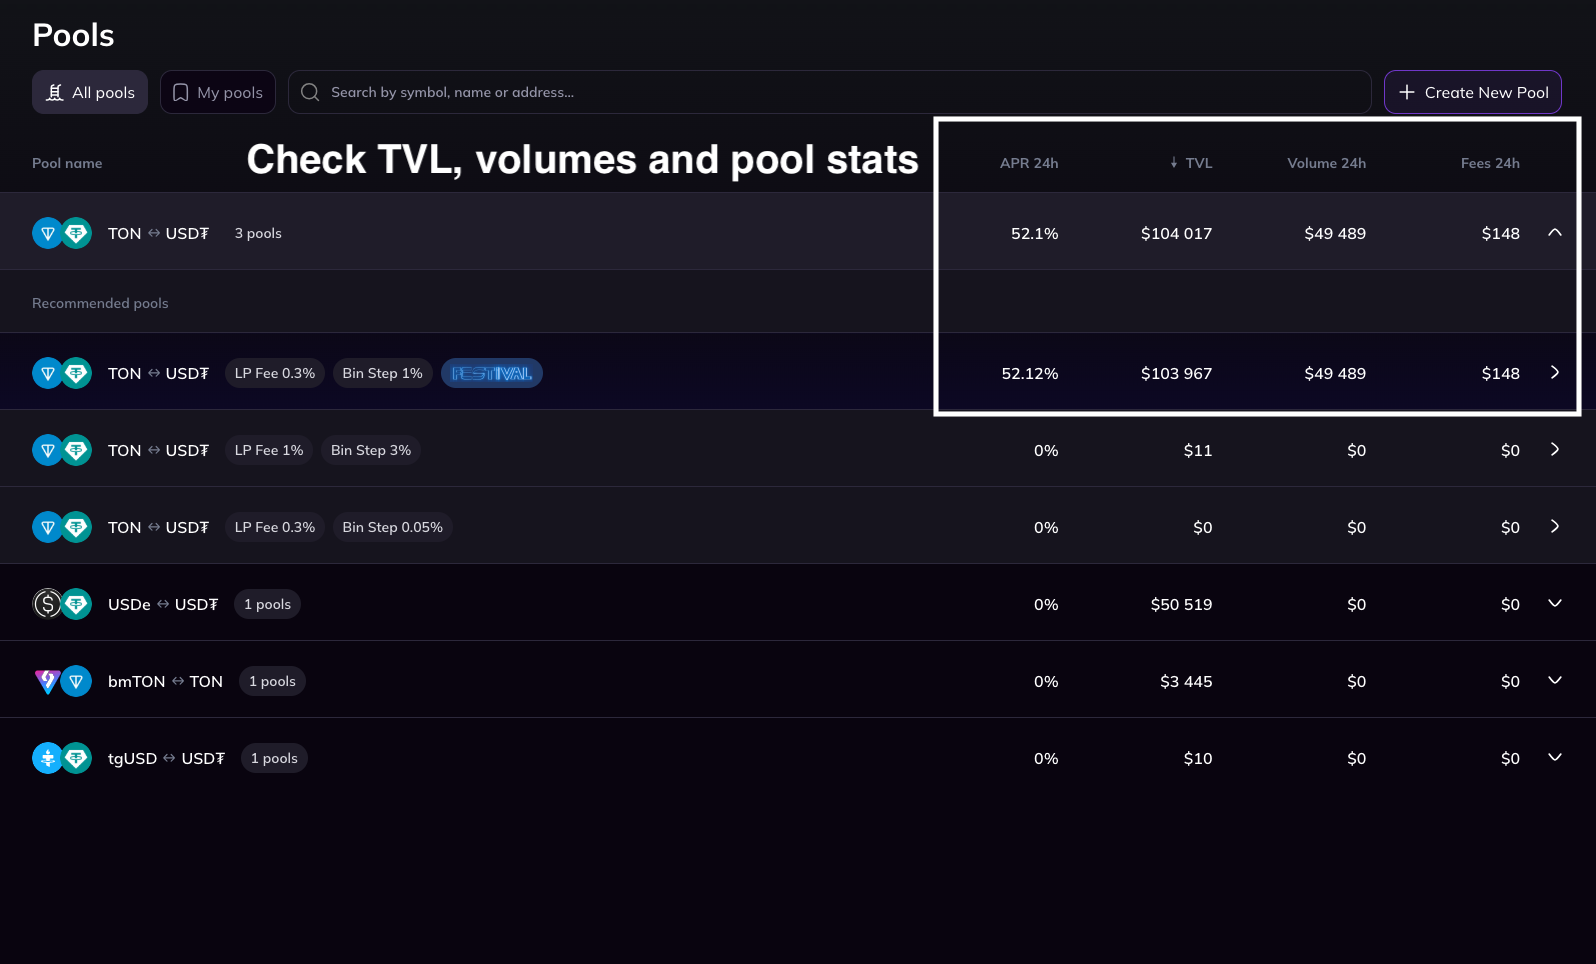
The Pools tab displays the full list of protocol pools, grouped by token pairs. The My Pools tab shows only the pools where the connected address has an active liquidity position.
Clicking on a pool entry in the list opens the pool’s detail page, which is divided into two sections: My Liquidity and Pool Info.
- The My Liquidity section shows the connected address’s position in the pool, including a chart of liquidity distribution across bins, as well as the amounts and value of tokens held.
- The Pool Info section provides key data such as overall liquidity distribution, TVL (Total Value Locked) trends, trading volume, fees generated, and price dynamics within the pool.
The page also includes buttons to navigate to the swap interface for the token pair or to add liquidity to the pool.
It is important to note that swaps are not necessarily executed in the currently viewed pool, as the routing algorithm selects the pool offering the best price based on the trade size.
Adding Liquidity to a Pool
You can add liquidity to a pool by clicking the "Add Liquidity" button on the pool's detail page.

In the interface, select the liquidity shape, specify the amounts of tokens, and choose the price range (range of bins) in which the liquidity will be distributed. The graph displays the current liquidity distribution.

To add both tokens to the pool, select a price range (range of bins) that includes bins on both sides of the active price. To add only one token, select a price range (range of bins) that includes bins only on one side of the active price. If only the single active bin, the bin containing the current price, is selected, the token amounts must correspond to a strict ratio, which is calculated automatically.
After filling in the fields, you can initiate the transaction to add liquidity to the pool, which you must confirm in your wallet. If the bin with the active price changes due to trading activity while the transaction is being sent, one or more bins may not be filled, and the liquidity from these bins will be refunded.
Shortly after confirming the transaction, the corresponding pool will appear on the "My Pools" tab, and the information about the added liquidity will be displayed in the pool's detail page.

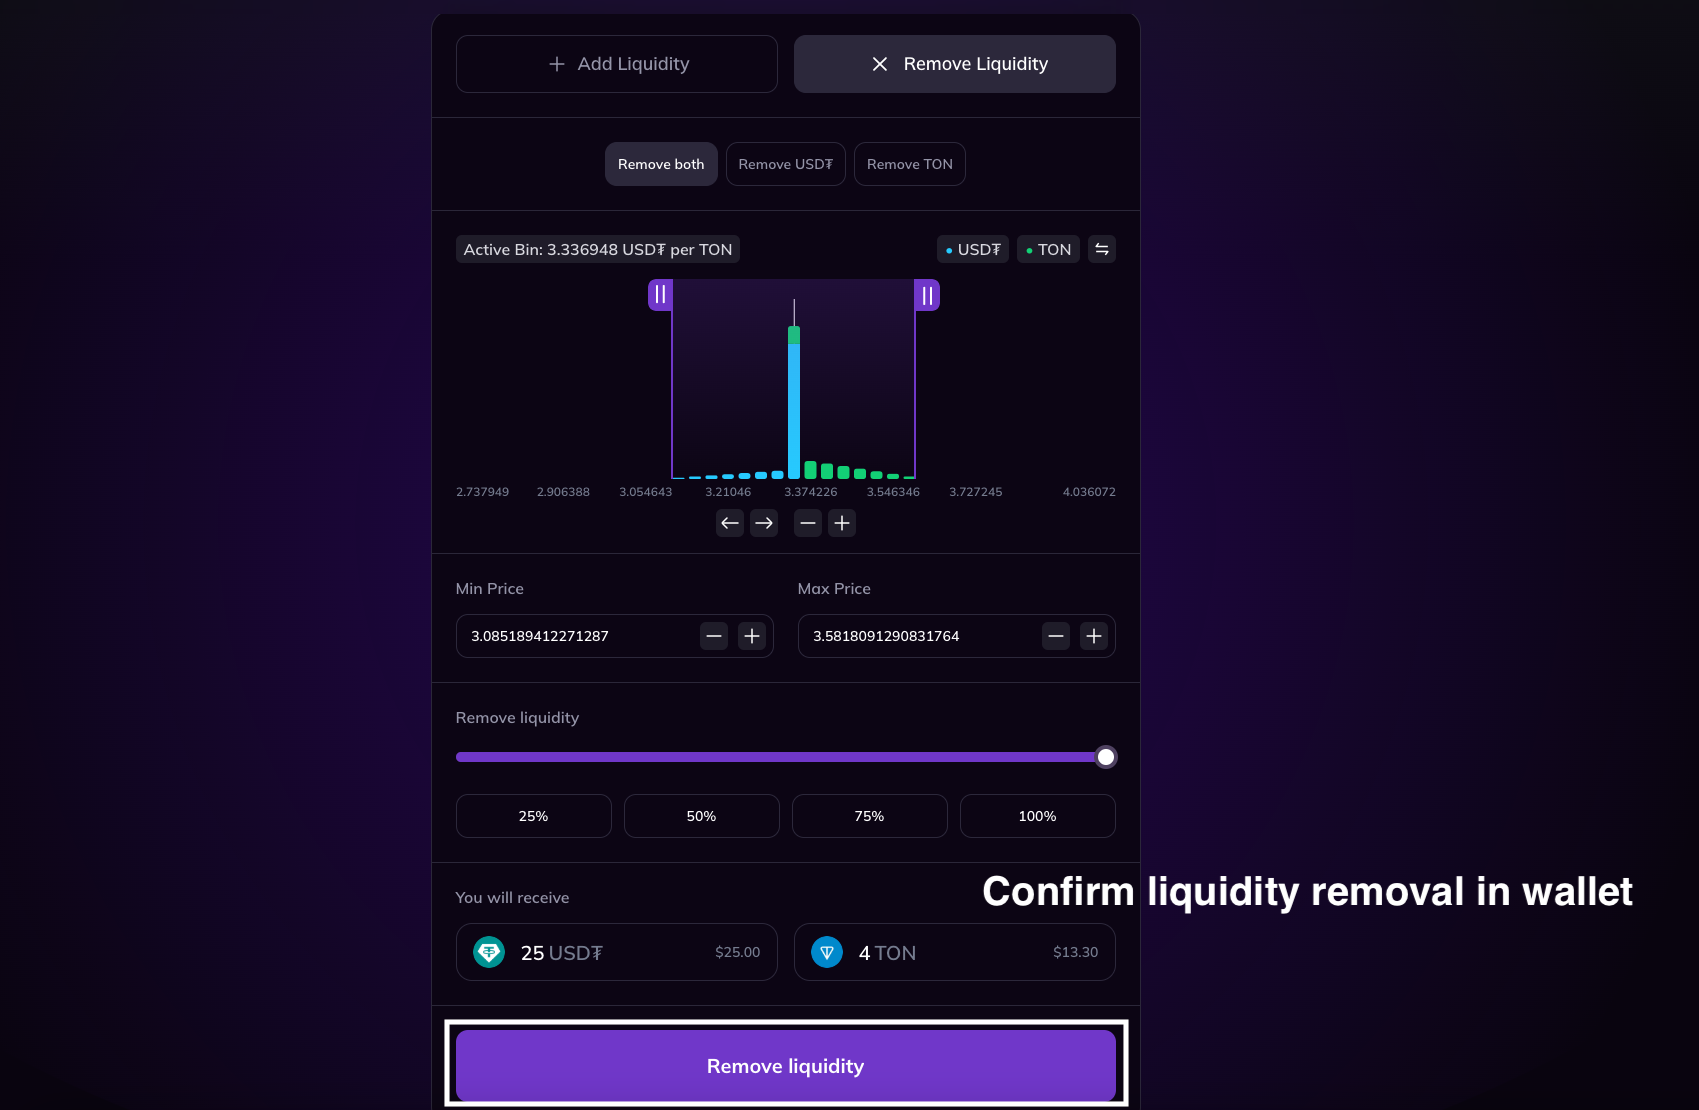
Removing Liquidity from a Pool
To remove liquidity, click the "Remove" button on the pool's detail page. In the interface, select the price range (range of bins) from which you want to withdraw liquidity, as well as the percentage of liquidity to remove from those bins. The graph displays the current distribution of your liquidity.

After filling in the fields, you can initiate the transaction, which you will need to confirm in your wallet. Shortly after confirming the transaction, the liquidity graph on the pool's detail page will reflect the changes.